Ryzen 7 1700のCPUを積んだPCでHyper-Vを有効にすると、シャットダウンがたまに遅れて、再起動したらイベントログにBugCheck 0x00000133とか残っていてブルースクリーンで落ちているという不具合が起きていた。電源を切りたいのに時間がかかるし、次回の起動も再起動扱いなので遅くなる。ダメもとでBIOSを最新に更新したら不具合がなくなった。
カテゴリー: 未分類
gatttoolでnotifyを受け取る
どのハンドルに0100を書き込めばいいのかわからずに困っていた。こちらのサイトが参考になった
[E6:BF:6D:43:62:BE][LE]> primary
 attr handle: 0x0001, end grp handle: 0x0007 uuid: 00001800-0000-1000-8000-00805f9b34fb
 attr handle: 0x0008, end grp handle: 0x0008 uuid: 00001801-0000-1000-8000-00805f9b34fb
 attr handle: 0x0009, end grp handle: 0xffff uuid: eeddffff-ccbb-aa99-8877-665544332211
 [E6:BF:6D:43:62:BE][LE]> char-read-uuid 0x2902 0x09
 handle: 0x000e   value: 00 00
 [E6:BF:6D:43:62:BE][LE]> char-write-req 0x0e 0100 --listen
 Characteristic value was written successfully
 Notification handle = 0x000d value: ff 86 13 61 3a 00 00 00 cc
 Notification handle = 0x000d value: ff 86 13 61 3a 00 00 00 cc
- primaryでハンドルを見つける。
- char-read-uuid 0x2902 見つけたハンドル
- char-write-req char-read-uuidで見つかったハンドル 0100 –listen
net-radio-archiveが動かなくなっていた
よくわからずにrootでbundle installしていた付けが回ってきた(今更
あと、更新スクリプトでbundle installしていないっぽいのもまずかったかも
ともかく、正月から録音が完全に止まっていたという大惨事になっていた。
$ bundle
Fetching gem metadata from https://rubygems.org/……….
Using rake 12.3.0
Using concurrent-ruby 1.0.5
Using i18n 0.9.1
Using minitest 5.10.3
Using thread_safe 0.3.6
Using tzinfo 1.2.4
Using activesupport 4.2.10
Using builder 3.2.3
Using erubis 2.7.0
Using mini_portile2 2.3.0
Using nokogiri 1.8.1
Using rails-deprecated_sanitizer 1.0.3
Using rails-dom-testing 1.0.8
Using crass 1.0.3
Using loofah 2.1.1
Using rails-html-sanitizer 1.0.3
Using actionview 4.2.10
Using rack 1.6.8
Using rack-test 0.6.3
Using actionpack 4.2.10
Using globalid 0.4.1
Using activejob 4.2.10
Using mini_mime 1.0.0
Using mail 2.7.0
Using actionmailer 4.2.10
Using activemodel 4.2.10
Using arel 6.0.4
Using activerecord 4.2.10
Using activerecord-import 0.21.0
Using bundler 1.16.1
Using chronic 0.10.2
Using coderay 1.1.2
Using coffee-script-source 1.12.2
Using execjs 2.7.0
Using coffee-script 2.4.1
Using thor 0.20.0
Using railties 4.2.10
Using coffee-rails 4.0.1
Using unf_ext 0.0.7.4
Using unf 0.1.4
Using domain_name 0.5.20170404
Using hike 1.2.3
Using http-cookie 1.0.3
Using multi_xml 0.6.0
Using httparty 0.15.6
Using multi_json 1.12.2
Using jbuilder 2.7.0
Using jquery-rails 4.3.1
Using json 1.8.6
Fetching m3u8 0.8.2
Bundler::GemspecError: Could not read gem at
/var/lib/gems/2.1.0/cache/m3u8-0.8.2.gem. It may be corrupted.
An error occurred while installing m3u8 (0.8.2), and Bundler cannot
continue.
Make sure thatgem install m3u8 -v '0.8.2'succeeds before bundling.
In Gemfile:
m3u8
$ bundle –path vendor/bundle で解決した(参考)
AE-TYBLE16でnRF5 SDKのサンプルを動かす
バイナリを生成する
12.3.0nRF5 SDKをダウンロードした。
pca10028/s130/config/sdk_config.hで CLOCK_CONFIG_XTAL_FREQ 255->0, CLOCK_CONFIG_LF_SRC 1 -> 0と書き換える(変えなくても動いていたが念のため)
各サンプルのmain.cのble_stack_init( )の冒頭にあるclock_lf_cfgを次のように書き換える。(これは書き換えないと全く動かなかった。)
nrf_clock_lf_cfg_t clock_lf_cfg;
clock_lf_cfg.rc_ctiv = 16;
clock_lf_cfg.rc_temp_ctiv = 2;
clock_lf_cfg.source = NRF_CLOCK_LF_SRC_RC;
clock_lf_cfg.xtal_accuracy = NRF_CLOCK_LF_XTAL_ACCURACY_250_PPM;
$(SDKROOT)/components/toolchain/{system_nrf51.c,system_nrf51422.c}の2つのファイルの冒頭 __SYSTEM_CLOCK (16000000UL) を (32000000UL) に書き換える。
これでコンパイルしてできたバイナリがAE-TYBLE16でで動くはず。
書き込む
書き込みはRaspberry Pi Zero W上で走らせたopenocdで行った。openocd.cfgは下記の通りだった。set WORKAREASIZE 0がないとエラーが出て書き込めなかった。swclk = 25, swdio = 24になるので適当に接続する。
source [find interface/raspberrypi-native.cfg]
transport select swd
bcm2835gpio_swd_nums 25 24
bcm2835gpio_trst_num 7
bcm2835gpio_srst_num 18
set WORKAREASIZE 0
source [find target/nrf51.cfg]
s130-201.hexは$(SDKROOT)\components\softdevice\s130\hex\s130_nrf51_2.0.1_softdevice.hexで、blinky.hexが先ほどコンパイルして生成されたhexになる。適当な方法でRasPiに転送する。今回はpscpを使った。
ケーブルが接続されていることを確認して、RasPiのlocalhost:4444に telnetで 接続した。下記のコマンドを入力する。
reset halt
halt; nrf51 mass_erase; flash write_image s130-201.hex 0; flash write_image blinky.hex
mww 0x4001e504 1 ; mww 0x10001000 0x0001C000; mww 0x10001008 0xffffff00; mww 0x4001e504 0;
reset run
ちなみに、openocdを実行するとシェルにはこんな出力が出る。
pi@raspberrypizero:~ $ sudo openocd
Open On-Chip Debugger 0.10.0+dev-00232-g6f5e9941 (2018-01-10-08:50)
Licensed under GNU GPL v2
For bug reports, read
http://openocd.org/doc/doxygen/bugs.html
BCM2835 GPIO config: tck = 11, tms = 25, tdi = 10, tdo = 9
BCM2835 GPIO nums: swclk = 25, swdio = 24
BCM2835 GPIO config: trst = 7
BCM2835 GPIO config: srst = 18
cortex_m reset_config sysresetreq
adapter speed: 1000 kHz
Info : BCM2835 GPIO JTAG/SWD bitbang driver
Info : JTAG and SWD modes enabled
Info : clock speed 1006 kHz
Info : SWD DPIDR 0x0bb11477
Info : nrf51.cpu: hardware has 4 breakpoints, 2 watchpoints
Info : accepting ‘telnet’ connection on tcp/4444
port 4444にtelnetした方は次のような感じになる
Open On-Chip Debugger
> reset halt target halted due to debug-request, current mode: Thread
xPSR: 0xc1000000 pc: 0x000006d0 msp: 0x000007c0
> halt; nrf51 mass_erase; flash write_image s130-201.hex 0; flash write_image blinky.hex
nRF51822-CFAC(build code: A0) 256kB Flash
Padding image section 0 with 2112 bytes
not enough working area available(requested 32)
no working area available, falling back to slow memory writes
wrote 110560 bytes from file s130-201.hex in 7.748491s (13.934 KiB/s)
not enough working area available(requested 32)
no working area available, falling back to slow memory writes
wrote 48232 bytes from file blinky.hex in 3.481749s (13.528 KiB/s)
> mww 0x4001e504 1 ; mww 0x10001000 0x0001C000; mww 0x10001008 0xffffff00; mww 0x4001e504 0;
> reset run
1/7追記:
mww 0x10001000 0x0001C000;は間違っていた。mww 0x10001000 0x0001b000;だった( pca10028/s130/ble_app_template_gcc_nrf51.ld )とかを見るとFLASH (rx) : ORIGIN = 0x1b000, LENGTH = 0x25000とか書いてあるので、ORIGINを参考にして設定する。適切に設定すれば2回目以降はmass_eraseが不要になる。そうするとsoftdeviceを書き込みしなおさなくて済むので時間が節約できる。sudo openocd -f openocd.cfg -c ‘init; reset halt; flash write_image erase blinky.hex; reset run; exit’ でやっている。さらに言えば、openocd.cfgの一番最後にadapter_khz 4000を付けると速くなった。
T480sの充電を速くする方法
画面を閉じてスリープ状態にすると充電が速くなるようだ。Innergieの60W充電器が手に入ったのでACアダプタ側に接続するタイプの電流計(本体側のType-Cコネクタに接続してはINとOUTが逆なので測れなかった)を挟んで眺めてみたら、起動状態よりスリープ状態の方が流れる電流が多かった。
再び試してみたら変わらなかった。
新しいstrongswanにVPN接続してもパケットが通らなかった
自宅のネットワークにアクセスできるようにIPSec/L2TPのVPNサーバーを使っていた。strongswanとxl2tpdを利用している。
Debian JessieだったかStretchで使っていた設定ファイルをArch Linux ARMにそのまま移した。最新版では使えなくなった設定があるのでsudo journalctl -fで出てくるエラーをつぶして、サービスが動くようにした。
しかし、パケットが通らない。サーバーからpingを打っても、Destination Host Unreachableだった。
LANのip address rangeが192.168.0.0/24で、xl2tpdのip range = 192.168.0.200-192.168.0.220 から 192.168.2.200-192.168.2.220 sudo iptables に変えた。(local ipも合わせる)そして、sudo iptables -t nat -A POSTROUTING -o eth0 -j MASQUERADE でNAT通すようにしたら、LANにアクセスできるようになった。
しかし、昔の設定が使えないのは謎なので、さらに調べていたら、どうもルーティングテーブルがおかしい。ip rangeを192.168.0.0/24にしている状態で、VPN接続を行う。そして、ip route get 192.168.0.200を実行すると
$ ip route get 192.168.0.200
192.168.0.200 dev eth0 table 220 src 192.168.0.25 uid 1001
cache
このようになる。
なんかよくわからないtable 220にppp0ではなくeth0経由で通信しようするように設定されている。とりあえず、ip route flush table 220(違ったかも)でルーティングテーブルのこのエントリを消すことで正しくVPNで接続したiPhoneにpingが通るようになった。
https://wiki.strongswan.org/issues/248
If I let charon (and not updown.sh) install the routes (install_routes=yes), this is what happens (10.32.32.200 is the ‘other side’):
とあるので、install_routesというキーワードをヒントに検索したら、次のような設定があることが判明した。
https://wiki.strongswan.org/projects/strongswan/wiki/StrongswanConf
| charon.install_routes | yes | Install routes into a separate routing table for established IPsec tunnels. If disabled a more efficient lookup for source and next-hop addresses is used since 5.5.2. |
デフォルトではyesになっているのをnoに変更したら直った。設定ファイルは /etc/strongswan.d/charon.confにあった。
これで、なんとか使えるようになった。
Raspberry Piで新しめのLIRCを使う
Arch Linux ARMとRaspberry Pi 3で使おうとしたが、以下のようなエラーが出て使えなかった。
$ irrecord --device=/dev/lirc0 MyRecord
Using driver devinput on device /dev/lirc0
Driver `devinput' not found (wrong or missing -U/--plugindir?).
accent           alsa_usb         asusdh           atilibusb
atwf83           audio_alsa       awlibusb         bte
bw6130           commandir        creative         creative_infracd
default          dfclibusb        dsp              dvico
ea65             file             ftdi             ftdix
girs             i2cuser          irlink           irtoy
livedrive_midi   livedrive_seq    logitech         macmini
mouseremote      mouseremote_ps2  mp3anywhere      mplay
mplay2           pcmak            pinsys           pixelview
samsung          sb0540           silitek          sonyir
srm7500libusb    tira             tira_raw         udp
uirt2            uirt2_raw        usb_uirt_raw     usbx
zotac
/etc/lirc/lirc_options.confのdriverをからdevinputからdefaultに変更すると使えるようになる。
# These are the default options to lircd, if installed as
# /etc/lirc/lirc_options.conf. See the lircd(8) and lircmd(8)
# manpages for info on the different options.
#
# Some tools including mode2 and irw uses values such as
# driver, device, plugindir and loglevel as fallback values
# in not defined elsewhere.

[lircd]
nodaemon        = False
driver          = default
device          = auto
output          = /var/run/lirc/lircd
pidfile         = /var/run/lirc/lircd.pid
plugindir       = /usr/lib/lirc/plugins
permission      = 666
allow-simulate  = No
repeat-max      = 600
#effective-user =
#listen         = [address:]port
#connect        = host[:port]
#loglevel       = 6
#release        = true
#release_suffix = _EVUP
#logfile        = ...
#driver-options = ...
Raspberry Pi 3をaarch64で動かす
cpuinfoとopenssl speedの結果から見るに、aesアクセラレーターは無いっぽい?あるいは認識されていないのか。パフォーマンスも案の定32bitと比べて悪い様だ。これは、A53が64bit命令を実行できるようにしているのはbig.LITTLEとして使っている場合、突然パフォーマンスコアから省電力コアに切り替わる際に64bit命令が実行できなくて不正な命令になってしまうのを防ぐためで、高速に実行できるかどうかは考えていないためだったはず。
[alarm@alarm ~]$ cat /proc/cpuinfo
processor       : 0
BogoMIPS        : 38.40
Features        : fp asimd evtstrm crc32 cpuid
CPU implementer : 0x41
CPU architecture: 8
CPU variant     : 0x0
CPU part        : 0xd03
CPU revision    : 4

processor       : 1
BogoMIPS        : 38.40
Features        : fp asimd evtstrm crc32 cpuid
CPU implementer : 0x41
CPU architecture: 8
CPU variant     : 0x0
CPU part        : 0xd03
CPU revision    : 4

processor       : 2
BogoMIPS        : 38.40
Features        : fp asimd evtstrm crc32 cpuid
CPU implementer : 0x41
CPU architecture: 8
CPU variant     : 0x0
CPU part        : 0xd03
CPU revision    : 4

processor       : 3
BogoMIPS        : 38.40
Features        : fp asimd evtstrm crc32 cpuid
CPU implementer : 0x41
CPU architecture: 8
CPU variant     : 0x0
CPU part        : 0xd03
CPU revision    : 4

[alarm@alarm ~]$ openssl speed aes-128-cbc
Doing aes-128 cbc for 3s on 16 size blocks: 4187159 aes-128 cbc's in 2.99s
Doing aes-128 cbc for 3s on 64 size blocks: 1135520 aes-128 cbc's in 2.99s
Doing aes-128 cbc for 3s on 256 size blocks: 291828 aes-128 cbc's in 2.99s
Doing aes-128 cbc for 3s on 1024 size blocks: 73494 aes-128 cbc's in 2.98s
Doing aes-128 cbc for 3s on 8192 size blocks: 9211 aes-128 cbc's in 2.99s
Doing aes-128 cbc for 3s on 16384 size blocks: 4600 aes-128 cbc's in 2.99s
OpenSSL 1.1.0i  14 Aug 2018
built on: reproducible build, date unspecified
options:bn(64,64) rc4(char) des(int) aes(partial) idea(int) blowfish(ptr)
compiler: gcc -DDSO_DLFCN -DHAVE_DLFCN_H -DNDEBUG -DOPENSSL_THREADS -DOPENSSL_NO_STATIC_ENGINE -DOPENSSL_PIC -DOPENSSL_BN_ASM_MONT -DSHA1_ASM -DSHA256_ASM -DSHA512_ASM -DVPAES_ASM -DECP_NISTZ256_ASM -DPOLY1305_ASM -DOPENSSLDIR="\"/etc/ssl\"" -DENGINESDIR="\"/usr/lib/engines-1.1\""  -Wa,--noexecstack -D_FORTIFY_SOURCE=2 -march=armv8-a -O2 -pipe -fstack-protector-strong -fno-plt -Wl,-O1,--sort-common,--as-needed,-z,relro,-z,now
The 'numbers' are in 1000s of bytes per second processed.
type             16 bytes     64 bytes    256 bytes   1024 bytes   8192 bytes  16384 bytes
aes-128 cbc      22406.20k    24305.44k    24985.94k    25254.31k    25236.29k    25206.15k
Raspberry Pi上のArch Linux ARMでAURのAsteriskをdistccで素早くビルドする
distccを使って、AURパッケージをビルドしようとしていた。しかし、何故かローカルでビルドされて、どうやってもスレーブにコンパイルが振られなかった。結局のところ、-march=nativeがgccの引数に与えられていたのが原因だった模様だった。menuselectでBUILD_NATIVEを無効にすることでビルドすることができた。Ryzen 7 1700を積んでいるPCではHyper-Vを使って8コア割り当てて、仮想マシン上でArch Linuxを走らせて、distccdを動かしている。x86_64 CPUを8コア利用することビルドは10分以内で終わった。configureに2,3分、圧縮にも同じくらいかかっているので、コンパイル自体は5,6分くらいだろうか。Raspberry Pi 3だけでビルドすると20分はかかった。ヒートシンクを取り付けていないので加熱でサーマルスロットリングがかかって遅かったかもしれない。
スレーブ側(PC)
こちらで紹介されているAURパッケージを入れる。/etc/conf.d/distccdを編集して、ローカルネットワークからジョブを送り込めるようにする。そして、 sudo systemctl start distccd-armv7hを実行して、distccdを走らせておく。
マスター側(Raspberry Pi)
~/distccd/hosts
192.168.0.XX:3635,lzo,cpp
trizen -S asteriskを実行した。
pkgbuildを編集するか聞かれたら編集するを選んで、下記のようにする。
build() {
cd ${pkgname}-${pkgver}
./configure --prefix=/usr --sysconfdir=/etc --localstatedir=/var --sbindir=/usr/bin
make menuselect
menuselect/menuselect --disable BUILD_NATIVE
make -j12
}
あとは適当に続行すればよい。
追記:日本語音声を入れ忘れていた。
make menuselect
menuselect/menuselect --enable CORE-SOUNDS-JA-WAV --enable CORE-SOUNDS-JA-ULAW
make -j4
Raspberry PiでiSCSIターゲットを利用したい場合Archを使うと楽かも
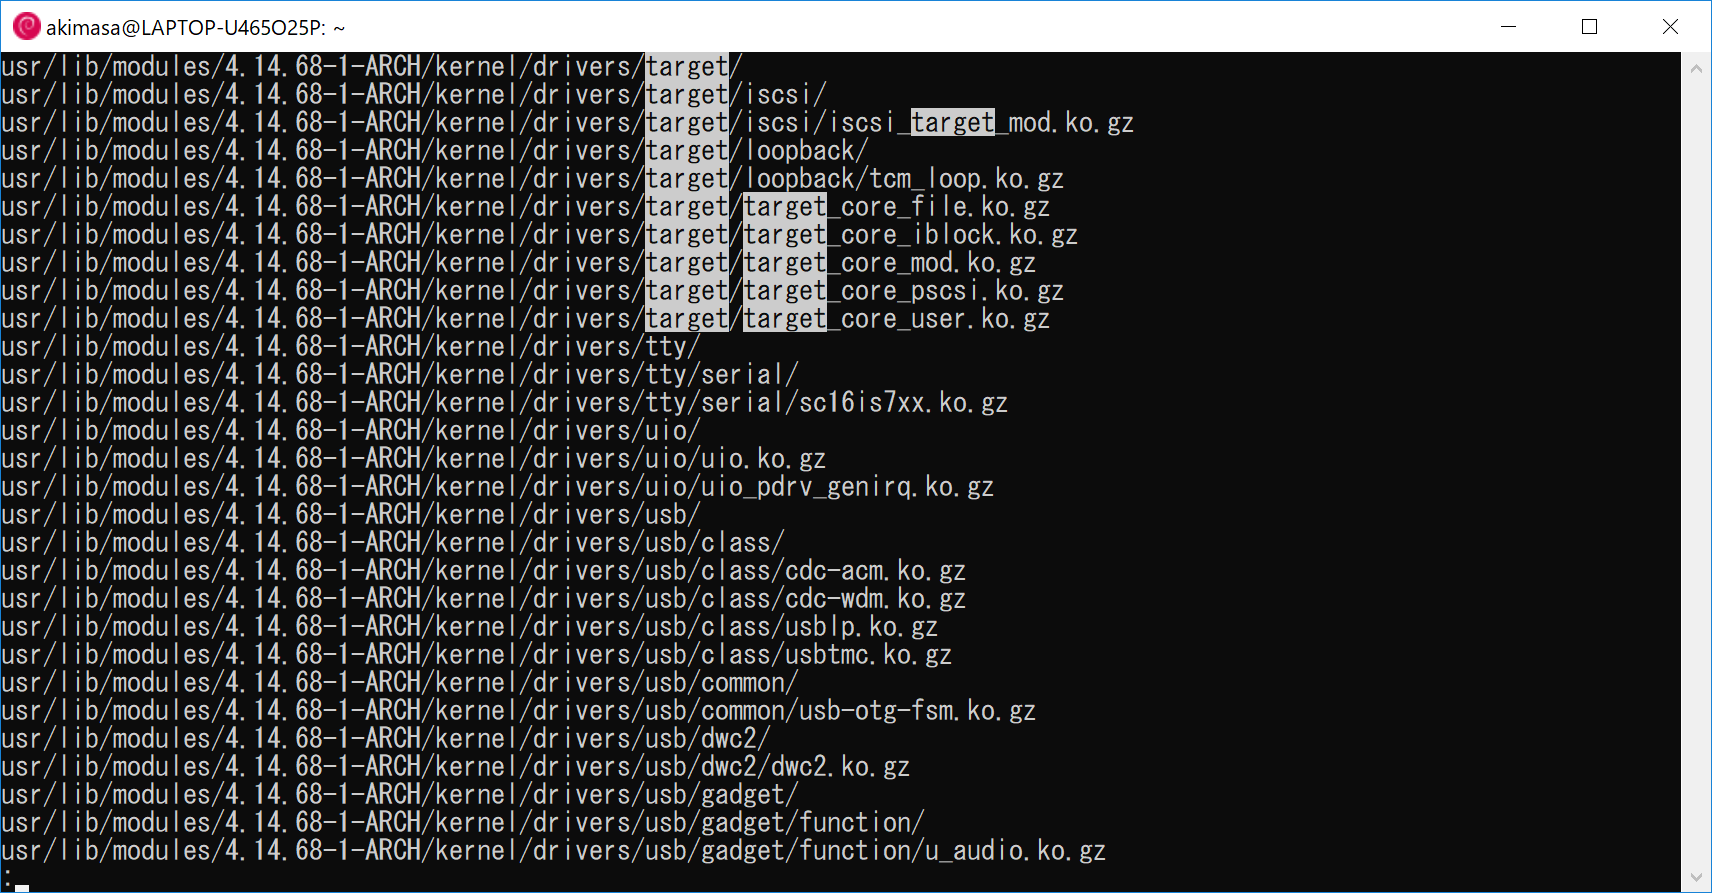
ArchLinux ARMのRaspberry Pi向けのカーネルには、iSCSIターゲットのカーネルモジュールが用意されているようだ(tar.xzの中身を見たら入っていた)。Raspbianを使わないでArchを使えば簡単にiSCSIターゲットを作れるかもしれない。